Strategy 1: Write a review for your blog
Writing a review of Gravity Forms for your blog is one of the easiest ways to promote the plugin. A review can help introduce your audience to Gravity Forms and explain to them why they should consider purchasing a license. Within the review, you want to explain what the plugin does, who it is for, and how it can benefit your readers.
Try and break your review into key sections, including…
1. Introduction:
In a few sentences, give your readers some background on Gravity Forms. Explain what Gravity Forms does and why they need it. (For example – Gravity Forms is a powerful forms builder that will help you create beautiful, stylish, and fully functional forms on your website. Form types include contact forms, multi-step forms, job application forms, surveys and quizzes, ecommerce payment and donation forms, and much more).
2. Who Gravity Forms is for:
Tell your audience who would most benefit from buying a Gravity Forms licence. As Gravity Forms is extremely user-friendly but can also be fully extended, this plugin is ideal for any WordPress user – from those looking to add a basic contact form to their website to developers and agencies who need to build complex form solutions on their website.
3. Top features:
List the key features of Gravity Forms, explaining how each point will benefit your readers. You can also give your review the personal touch by sharing what you love about Gravity Forms and which features you have found particularly useful. To get you started on the right track, some our top features include:
• An intuitive drag-and-drop visual form editor
• Built-in features like conditional logic, multi-page forms, calculations, email notifications, and much more
• Extensive collection of integrations and third-party add-ons
• Developer Friendly (Gravity Forms is fully extendable)
• Thorough documentation and support
4. User experience:
Sharing screenshots of the Gravity Forms editor, or even a short video tutorial demonstrating how to create a basic form, will go a long way to impressing your audience and helping them decide if Gravity Forms is proper for them. If you don’t own a Gravity Forms license, simply sign up for our free demo (no credit card required) to get an insider’s view.
5. Pricing:
Gravity Forms offers three plans, all packed full of different features and integrations. Talk your users through the plans and their prices, emphasizing that these plans have something for everyone, whatever their needs and budget.
6. Conclusion:
Summarize the key benefits of Gravity Forms and why your audience should buy it. Don’t be too salesy – you might even want to share reasons why it might not be for some people. Try to end on a high note – by making your readers excited about Gravity Forms, they are more likely to purchase.
7. Call to action:
Add a call to action at the end of the review, encouraging your readers to visit the Gravity Forms website and make a purchase. For example, “Are you ready to build beautiful forms with Gravity Forms? Then make a purchase today!” It is in this call to action that you would add your affiliate link.
8. Add the affiliate link to your review:
Once you have written and uploaded your review to your blog and added some images to help grab your audience’s attention, you must add your affiliate link.
I recommend you do so within the call to action, as well as at a couple of other key places throughout the text – somewhere near the beginning of the review and again in the middle. This ensures that if readers want to click through and check out the Gravity Forms website before they get to the end of the blog post, they do so using your affiliate link.
To add the affiliate link, copy the generated link from your PartnerStack dashboard. Then, switch back to your review and insert the link as a hyperlink within the text. Preview your review and check that the link is working.
When you are ready to publish the review, don’t forget to also share it on social media and with your mailing list.
Strategy 2: Write tutorials on how to use Gravity Forms
Writing a tutorial on how to use Gravity Forms is a great way to show your audience how user-friendly and feature-rich this plugin is. An in-depth, step-by-step tutorial can demonstrate to your readers how to get started with Gravity Forms – from installing the plugin and using the form editor to build a form to embedding the form on your website.
During the tutorial, you should also share screenshots for each step of the process. This extra information will help your audience visualize the form-building experience and give people confidence that the plugin is easy to use, has all the features and functionality that they need, and is a good fit for their needs.
Note: If you aren’t a Gravity Forms customer yourself but still want to add screenshots to your articles demonstrating how to use the plugin, don’t worry. Simply sign up for the free Gravity Forms demo (no credit card required) to gain access to this plugin.
When writing a ‘How to Build a Form for Your Website using Gravity Forms’ step-by-step tutorial, you should consider including these sections…
1. Introduction to Gravity Forms:
Introduce Gravity Forms to your readers and briefly cover the plugin’s top features and what types of forms it can help you create. Here is a good place to explain why you use it on your website and why you would pick it over the other form builders on the market.
2. Install the Gravity Forms plugin:
Explain to your audience where you buy the plugin (you may want to discuss the different types of Gravity Forms plans available), and then detail how to download the plugin, upload it to your WordPress website, and connect accounts with your license key.
3. Build your form in the form editor:
Demonstrate to your audience how user-friendly the drag-and-drop form editor is with screenshots and clear instructions on how to use it. Showcase the numerous fields and how to customize them to build a form to your specifications.
4. Configure form settings, confirmations, and notifications:
Briefly discuss some of the form-setting options, as well as how to edit the default confirmation and notification messages.
5. Install an add-on:
This is an optional section, as installing an add-on isn’t 100% necessary, but as add-ons are a feature that many of your readers will be interested in, it does make sense to include it. Some of our most popular add-ons include MailChimp, HubSpot, PayPal, Stripe, and Zapier, so choose the one that you think will be most relevant to your audience and show how to install it and integrate it with your form.
6. Embed the form:
The last step of the tutorial is to embed the form into your website. It is worth noting here that within the block editor, users can easily style their forms using the built-in block styling options, allowing them to create beautiful forms that reflect the look and feel of their websites.
Make sure you start and finish off the tutorial with some images of the stylish forms you can create with Gravity Forms so your audience understands exactly what can be achieved with this plugin, encouraging them to make a purchase.
Other tutorial topics could include…
• How to build a multi-step form using Gravity Forms
• How to build an interactive quiz using Gravity Forms
• How to accept donations on your website using Gravity Forms
• How to create a job application form using Gravity Forms
• How to create user-submitted posts with Gravity Forms
Strategy 3: Write comparison articles
Posting a few comparison articles, comparing Gravity Forms to other form builders, is another great option when it comes to writing promotional articles. By pitting form builders against each other, you can really explore the features, as well as the pros and cons of each.
A comparison article could contrast just two products (e.g., Gravity Forms vs. TypeForm) or multiple products (e.g., Gravity Forms vs. WPForms vs. Ninja Forms). Make sure you write a balanced comparison detailing the pros and cons of each form builder, not just singing the praises of Gravity Forms.
When writing a comparison article, consider including these categories…
Key features:
List the key features of each form builder you are comparing, with an emphasis on what makes each unique.
Ease of use:
Compare the usability of each form builder, with a focus on the editor and form creation process.
Integrations:
Discuss the different integrations that each form builder offers and how form functionality can be extended via the add-ons they offer.
Pricing:
When discussing pricing, clarify what customers are getting for their money. For example, if Gravity Forms is more expensive than some other form builders, it is because we offer superior features.
Support:
Your readers will want to know what sort of support is offered by each product. Be clear about whether documentation is provided or, like in the case of Gravity Forms, there is a support service where customers can contact an expert if they need help.
It is ok to wade in and offer your expert opinion during a comparison. If you genuinely believe Gravity Forms is the better product, then tell your audience so, with an explanation of why.
Strategy 4: Create listicles
A listicle, also known as a product round-up, is a quick and easy win when it comes to writing affiliate content. A listicle is usually made up of 10 or more products, which in this case would be form builders, with a brief summary of each.
A product summary only needs to be roughly between 100 – 200 words. For each summary, consider discussing…
• Who is the Form Builder For? (who’s the target audience?)
• Top Features
• Unique Selling Points (what makes it stand out from the competition)
By providing a background for each form builder, your readers can then go on and do further research to find the right product for their needs.
Here are some form builders that you may want to include in your listicle…
• Gravity Forms
• WPForms
• Ninja Forms
• Formidable Forms
• Fluent Forms
• JotForm
• TypeForms
Images of forms created by these form builders, or the form editors, will help your audience see what each solution is capable of, as well as help your article look more visually appealing.
Whatever types of articles you create to promote Gravity Forms, don’t forget to add links to them. As previously mentioned, links are best positioned at the beginning, middle, and end of an article and will encourage your users to click through to Gravity Forms and make a purchase.
Make sure you always preview the page and check that the link is working!
Strategy 5: Add a Gravity Forms listing to a Recommended Resources page
A recommended resources page is a must-have for an affiliate site. Here, you can list all the resources you recommend to your audience, helping them easily find products they might need and helping you make money through affiliate links.
For example, if your website’s aim is to teach people how to create a website using WordPress, on your resource page, you would list all the tools and services people would need to build their own site. This resource could be split into categories, including…
• Hosting Providers
• Domain Name Generators and Registrars
• WordPress Theme Marketplaces
• WordPress Plugins
Within the WordPress plugins category, naturally, you would include Gravity Forms!
Make sure you only include high-quality products that you are confident to endorse – that way, your audience will trust your judgment and happily revisit your site when they need more information.
Add a Gravity Forms image and link
Creating a visually pleasing resources page, that is well organized and easy on the eye, is a must. Best practice is to display an image of each resource with the link attached.
To add a Gravity Forms image to your resource page, open the Impact dashboard, and on the Home page, scroll down to Resources. Here, you will find Gravity Forms icons, as well as larger banners – for a resource page, you want to choose something smaller in size that works with your page’s design.
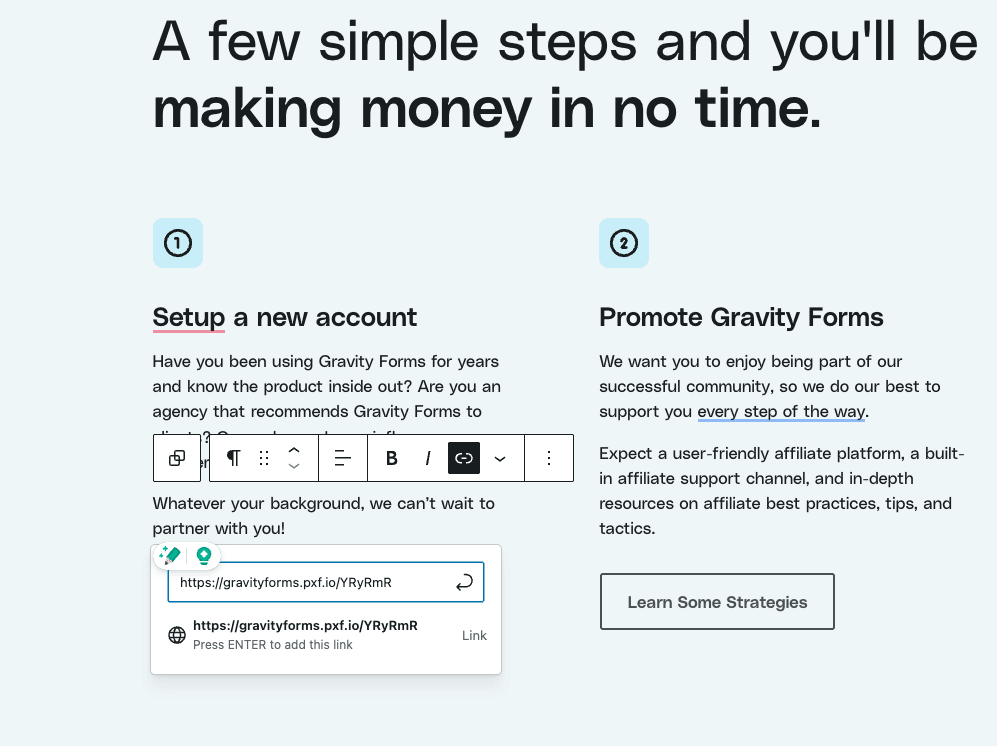
Strategy 6: Add a Gravity Forms affiliate link to your website’s footer
If you have a beautiful and stylish website that uses Gravity Forms, then you should advertise that fact to your audience. People are often looking to upgrade their own websites, and if they are impressed with your site, then they will be interested in the tools that you used to make it.
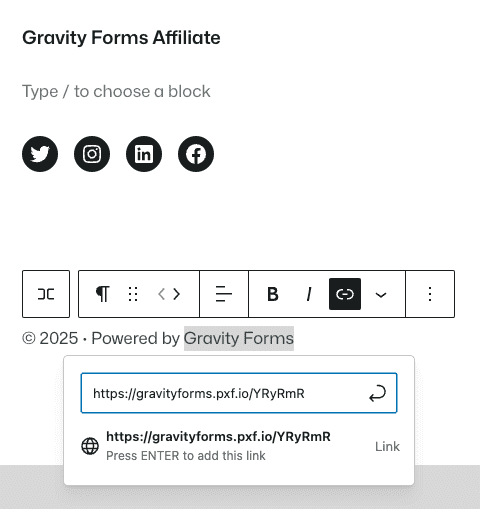
An easy way to do this is to add the sentence “Powered by Gravity Forms” to your website footer. By adding an affiliate link to this sentence, when people click through to find out more about this plugin, they do so using your affiliate code. This is a subtle but effective way to promote Gravity Forms on your website.
To add an affiliate link to your footer, open the Customizer on the live side of your website.
Select Widgets > Footer and then add a Text widget to your footer. Type in the sentence “Powered by Gravity Forms” and insert your affiliate link as a hyperlink.
Then, publish the changes and check the link.
Equally, if you would rather, you can edit the footer of your site within your WordPress dashboard. Simply select Appearance > Widgets from the WordPress admin menu, and then follow the same process (ie, add a Text widget to the footer, write the sentence, and add the link).
Strategy 7: Insert an affiliate link under your contact form
If you use Gravity Forms on your website then no doubt you have a stunning contact form that is going to grab the attention of your audience. Use this to your advantage – your eye-catching form can help to showcase what can be achieved with Gravity Forms and help to inspire and impress your audience.
A great way to cash in on this as an affiliate is to advertise the fact your form is made by Gravity Forms. To do so, under the form, add a paragraph that reads something like this…
“Do you like the look of this contact form? Would you like to create a contact form like this for your website? This contact form was built using Gravity Forms – check it out”.
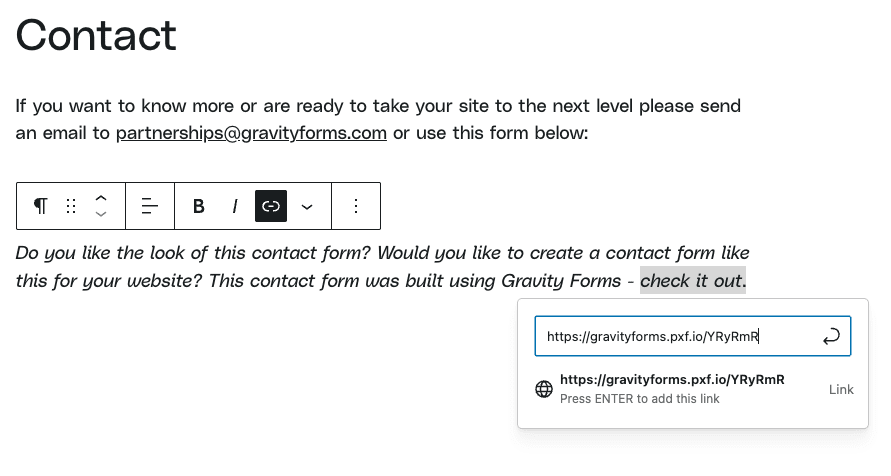
Don’t forget to add an affiliate link within the text and check it works once you have published the page.
Strategy 8: Display a Gravity Forms asset as a banner
If your theme has a banner or advertising space on the homepage of your site, then consider embedding a Gravity Forms asset in this space. Within your Impact dashboard, under Assets, you will find a wide assortment of on-brand Gravity Forms assets that you can use on your website. These stylish images have been created especially to wow your audience, and if they are clicked on, they will take the user directly to the Gravity Forms website using your affiliate code.
To embed a banner on your site, open the Customizer on the live side of your website and select Appearance, then Editor. Select the Header you’d like to edit by clicking on it directly and clicking the Edit button. You should now see the Header alone. You will now need to choose the area where you want to add the asset.
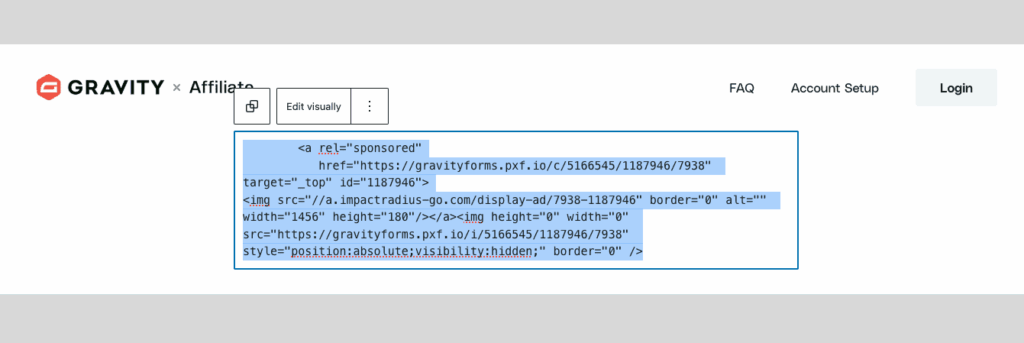
Click the Plus button where you want to add your image, then click the three dots in the options bar, and then click Edit as HTML.
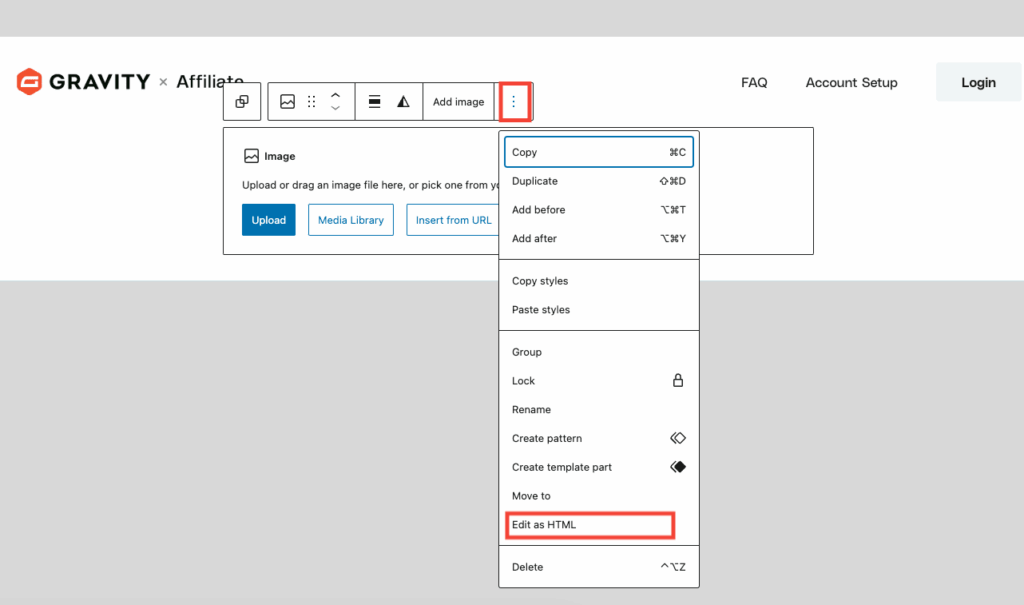
Then, paste the HTML code of your chosen asset into the HTML widget. (When choosing the right asset to use as a banner or in a blog post, opt for a horizontal image – dimensions can be found next to the assets in the Impact dashboard).
If you want to adjust the asset size, you can edit the image dimensions directly within the HTML code. Now, Publish your changes and check that the image links to the Gravity Forms website using your affiliate link.
If your WordPress theme doesn’t contain a banner area, another option is to simply add an asset at the top of a page or blog post.
Strategy 9: Embed a Gravity Forms asset in a sidebar
Embedding a Gravity Forms graphic into a sidebar follows much the same process as a banner but instead chooses a vertical asset. If you use custom sidebars, consider only displaying the asset on certain pages – for example, popular blog posts or pages that receive the most traffic.
To embed an asset in a sidebar, open the Customizer on the live side of your website and select Blocks > Columns. Decide the column layout you want for the page and click the image. Then click the Plus button where you want to add your image, then click the three dots in the options bar, and then click Edit as HTML. Then, paste the HTML code of your chosen asset into the HTML widget.

When you have finished, publish your changes and, of course, check the asset links to the Gravity Forms website.
Strategy 10: Share on social media
Sharing a link to Gravity Forms on Facebook or Twitter is another quick and easy win.
For example, you could write:
Are you looking for a new form plugin?
I use Gravity Forms on my website and can’t recommend it enough. Easy to use, with advanced features and multiple add-ons, you can use this WordPress plugin to create any type of form that you need.
Check it out today…
#WordPress #GravityForms #FormBuilder
Strategy 11: Create email campaigns
Sending emails to your mailing list is a great way to stay in contact with your target audience and encourage them back to your website. Here are a few top tips…
Build your mailing list:
The first step is to build your mailing list. In addition to adding an opt-in form to your website, consider creating a high-value lead magnet that is relevant to your niche. This will encourage people to sign up for your mailing list and ensure you can continue to promote Gravity Forms to them after they have left your website.
Use an emailing marketing service:
Using a professional email marketing provider, like Mailchimp or AWeber, will help you set up automated email campaigns, give you access to stylish pre-built email templates, allow you to send emails to different segments of your list, provide detailed analytics so you can track how well your emails are received, and much more.
Send interesting content:
Send a mixture of content to your mailing list, always ensuring it is high quality and relevant to your audience. Consider creating newsletters, sharing new blog content (especially posts that discuss Gravity Forms), and news pieces alongside the more promotional emails.
Don’t forget affiliate links:
Easily add your Gravity Forms affiliate link to an email by copying it from your Impact dashboard and inserting it as a hyperlink. When the email recipient clicks on it, they will be taken directly to the Gravity Forms website using your referral code.
Strategy 12: Run paid ads
Paying for ads on Google or on Facebook can be an effective strategy to boost your affiliate sales. However, it is worth noting that, unlike the other affiliate strategies that we have mentioned to promote Gravity forms, paid ads come with a financial risk.
If you are keen to pursue the paid ads route, here are some points to consider…
Targeting:
Before you get started with paid ads, read up on the ad targeting options. Both Google and Facebook allow you to select target audiences based on demographics, location, keywords, topics searched, devices used, and more. You can also choose to target ads at people who have already visited your site and expressed an interest in Gravity Forms or target ‘similar’ audiences. This ensures your ads are seen by the ‘right’ audiences, increasing the chance of ad engagement.
Monitor your ad campaigns:
Keep a close eye on your ad campaigns to ensure they are making you money, not losing it. Sending traffic to your website is insufficient – you need your ads to convert to sales. If it looks like an ad campaign is not achieving the results you were hoping for, cancel it and consider targeting a different audience.
Follow the Gravity Forms brand guidelines:
Gravity Forms has strict brand guidelines. Make sure you check them out and adhere to them throughout every campaign you run.
Strategy 13: Host webinars
A successful webinar should be educational, not promotional. The type of webinars you run will very much depend on your niche, but the subject of a webinar should always aim to help your audience solve a problem they have. Gravity Forms should then be included in the webinar as a tool to solve this problem.
For example, if your niche is helping people create their own website, then webinar topics could include…
• How to create a contact form for tour WordPress website
• How to build a multi-step form
• How to add a payment form to your website
Any of these topics would be beneficial to someone setting up a new website, and if you demonstrate how to implement these different form types using Gravity Forms, then your audience may well click through and purchase the plugin.
Make sure you add your affiliate link to the webinar notes so your viewers click through to the Gravity Forms website using your referral code.
Strategy 14: Word of mouth
If you run a web development, design, or marketing agency, or you are a freelancer with lots of clients, then promoting Gravity Forms through word of mouth is an obvious quick win. Advising clients to use Gravity Forms on their website, explaining the benefits and what they can do with the plugin, will help encourage people to buy the product.
However, if you promote Gravity Forms through word of mouth, how do you cash in on the referral? The obvious answer here is to create a landing page that you can share with your clients. This landing page can summarize Gravity Forms’ key features, helping to re-emphasize the conversation you have already had with a client before sending them the link to the page.
Keep your landing page simple with no distractions – a minimal design, short, smart copy highlighting the benefits of using Gravity Forms, and a call to action in the shape of an eye-catching button. This will encourage your clients to quickly click through and purchase Gravity Forms.
Summary
We hope these 14 strategies to promote Gravity Forms on your website are useful to you. To summarize…
Content:
There are numerous ways to promote Gravity Forms as an affiliate, but creating informative and interesting articles you can publish on your blog is a great option. To ensure your blog stays engaging and relevant to your audience, write different types of articles and include helpful screenshots.
Links and assets:
Within your Impact dashboard, you will find your affiliate links and Gravity Forms assets that you can embed in your website. Embedding a link or an asset is a quick and easy process and ensures your audience can easily click through to the Gravity Forms website using your affiliate tracking code.
Although it will be tempting to add Gravity Forms assets and images throughout your website, I would always try to remember the ‘less is more’ approach. If people visit your website to read blog posts and find information on a particular topic, they won’t want to feel like you are selling them something. In fact, if your website becomes too sales-driven, you may end up losing visitors.
Instead, opt for a subtle approach – create content that adds value to your readers, and then, alongside this, insert Gravity Forms affiliate links or assets where appropriate.
Off-site strategies:
As well as writing promotional content for your blog and adding Gravity Forms links and assets to your website, you also want to consider implementing some off-site affiliate strategies (eg, social media, email campaigns, and paid ads). These off-site options will enable you to continue to promote Gravity Forms to your audience after they have left your website, as well as help your affiliate links reach a wider audience – ultimately boosting your referral numbers.
Of course, the methods mentioned in this guide aren’t the only ways to promote Gravity Forms as an affiliate – feel free to get creative!
However, these 14 strategies are a good place to start – just adopt the methods that best suit your website and audience. By understanding what strategies appeal to your target audience and focusing solely on them, you will quickly find your affiliate revenue growing.
Good Luck!